|

|
|
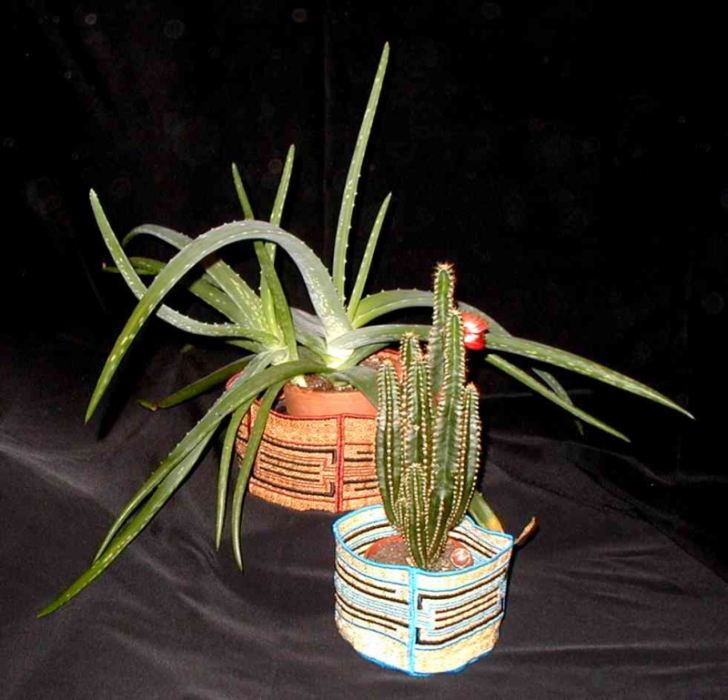
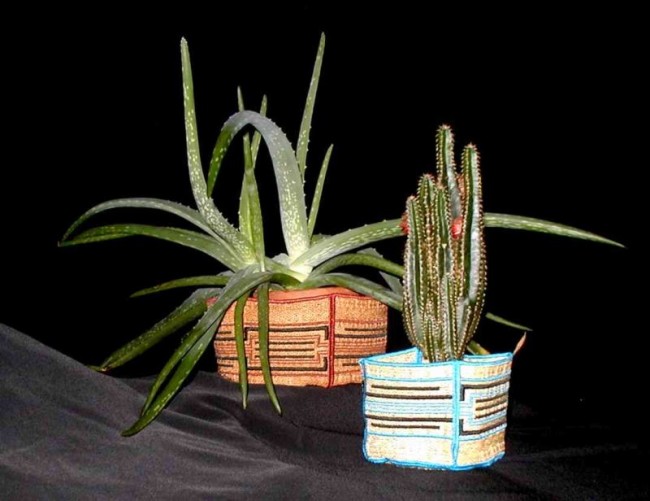
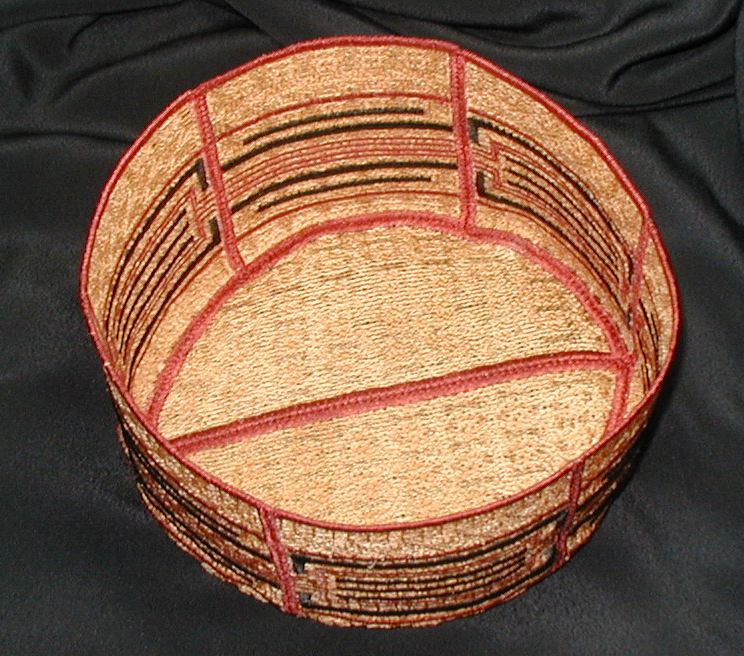

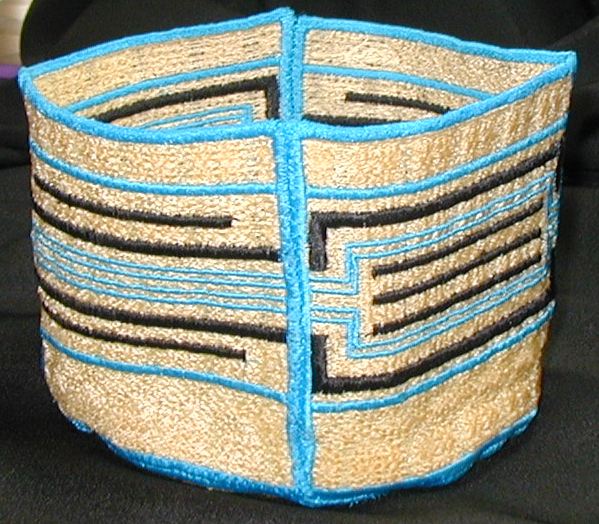


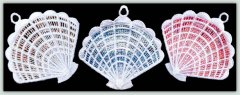
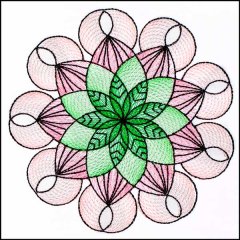
BFC0178 Lace Bowls - Southwest Baskets
With the popularity of Lace Bowls and designs with a Southwestern flavor I had to see how the two could be combined! These baskets look great as planters, but I can see them also being used to hold fruit, gifts, all kinds of things. The design compliments the *Baskets and Bowls* designs which could be used for a mat under the bowl or a towel tucked inside.
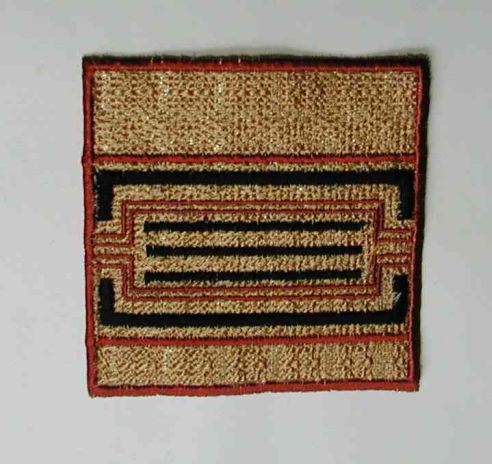
The bowl can be stitched with 6 sides or 4 sides. There are two different designs on the side pieces and they can be alternated or use just one to change the effect.
These bowls can be stitched in any size hoop. The bottom can be stitched in one, two or 4 sections depending on the size you are making and the size of your hoop.
6 Designs each in 1 Sizes S
 |  | 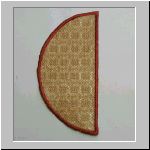 | 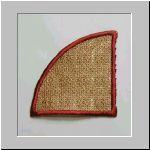 |
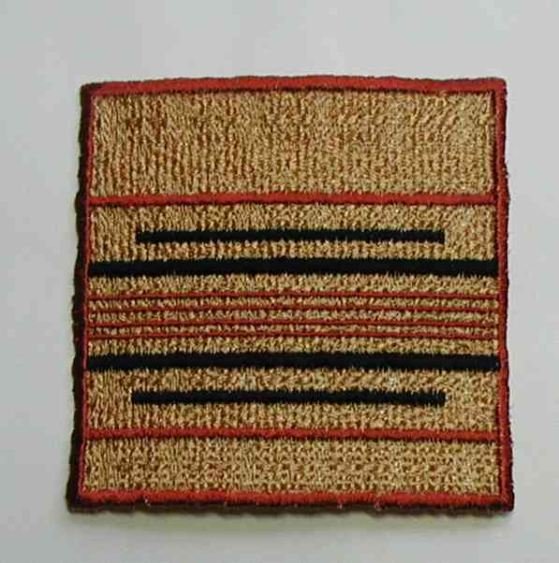
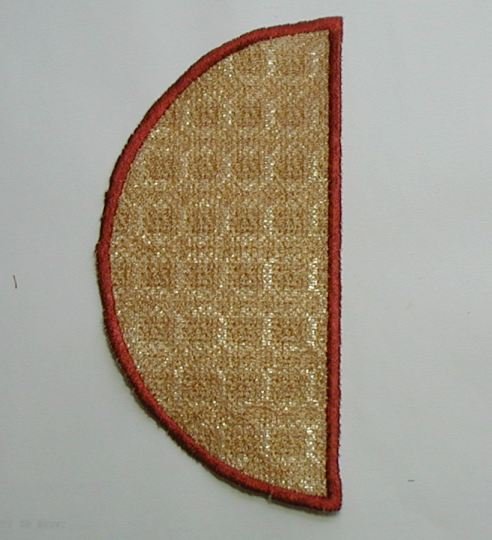
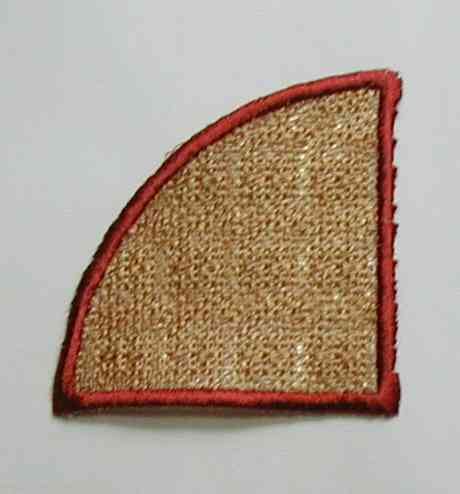
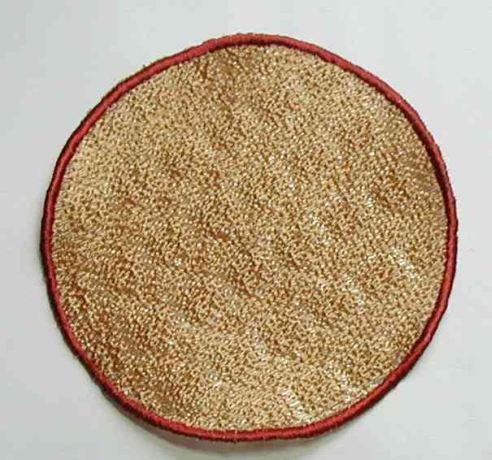
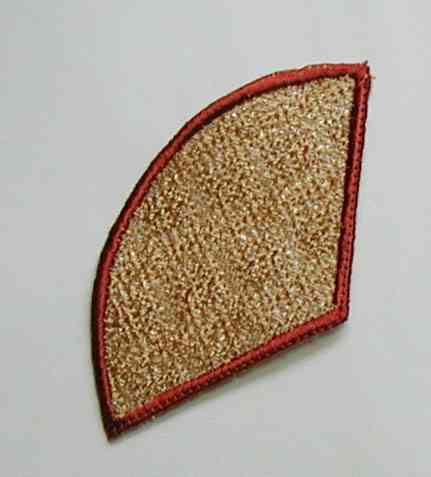
Designed Side 1 3.9 " X 3.9"(99x99mm) Stitch count: 26061 | Designed Side 2 3.9 " X 3.9"(99x99mm) Stitch count: 24974 | 6 Sided Bottom (stitch 2) 6x10 7.2 " X 3"(66x78mm) Stitch count: 9472 | 6 Sided Bottom (stitch 4) 4x4 and 5x7 3.7" X 3.9"(93x99mm) Stitch count: 18782 |
 | 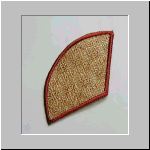 | ||
4 Sided Bottom 5x7 4.8 " X 4.8"(122x122mm) Stitch count: 20738 | 4 Sided Bottom 4x4 (stitch 3) 2.6 " X 3.6"(66x91mm) Stitch count: 8741 |
How to Assemble | |||
Step One: Stitch out the bottom and sides of your bowl on water soluble stabilizer. I have used two layers of Badgemaster and Arc Rayon thread 40wt for both the top and bottom thread. Stitch either 4 sides or six sides of your choice. Choose the correct bottom and stitch the correct number of sections. Step Two: Assemble Bottom: If your bottom is made up of more than one section, zig zag these together first. Then attach the sides to the bottom. Starting at one side of the bottom piece, and using a zig zag stitch on your machine, stitch around the edges of the bottom section, butting the bottom of the side pieces as you go. Before I started to do this, I marked off on the bottom piece where the side sections would go to make it easier. You will find the sides fit easily around the bottom. Step Three: Stitch sides. Starting at the junction of the bottom and the side pieces and using a zig zag stitch, start sewing the two side pieces together. Just butt the sides next to each other slowly allowing them to meet all the way to the top of the bowl as you stitch. The first few sides will sew easily. Go very slow on the last one, letting the bowl curve around your needle. I would hold the sides together, stitch a small area, stop and again make sure the edges were butting and continue. When you have reached the top of the bowl, turn your work and stitch back over the seam ending at the bowl bottom. Repeat for all sides. Step Four: Soak your bowl in water according to the instructions that came with your stabilizer. After soaking the recommended time, rinse the bowl thoroughly. Place on an absorbent surface, shape with fingers and allow to dry. Check often during the drying process as you may need to reshape the bowl a little- especially around the bottom seam. I started drying mine right side up and then inverted it over a big jar so I could *finger shape* the bottom more easily. Once it is dry, I gave it a good steaming, pointing the iron towards the bottom seam and moving around the circumference of the bowl. I then let it dry again.
| |||
All of our machine embroidery designs will come in any or all of the following hoop sizes: (You will receive links to download the size(s) you purchased and all formats)
Small for 4 x 4 inch hoop, Medium for 5 x 7 inch hoop, Large for 6 x 10 inch hoop, and Jumbo 8 x 12 inch hoop.
Each design description above will state the sizes the set comes in: S, M, L, J standing for Small, Medium, Large and Jumbo. These will be written SML, meaning Small, Medium and Large, or perhaps MLJ, meaning Medium Large and Jumbo, or even SMLJ meaning the set comes in all four hoop sizes
Formats Available: ART3, ART4, DST, EXP, HUS, JEF, PES, VIP, XXX
If your format is not listed email us.