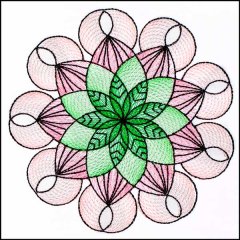
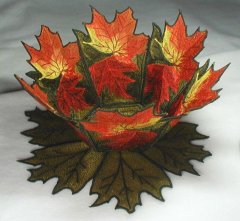
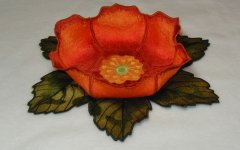
BFC0172 Lace Bowls - Elegance
This bowl is reminiscent of a Lotus Bowl, complete with rounded sides. It is extremely easy to put together, comes in both 5 and 6 sided versions, has a plain panel for your own designs, has no jump stitches (even if using two colors) and does not require any stiffening after washing out the stabilizer. It comes in sizes for both the 4x4 and 5x7 hoops. You will find instructions for making this bowl below. I have illustrated the small bowl using 5 sides and the larger bowl using 6 sides but you have the options on both sizes. The diameters will vary depending on the number of sides you use.
4 Designs each in 3 Sizes SM
|
Figure 1
|
Figure 2
|
Figure 3
|
Figure 4
|
|
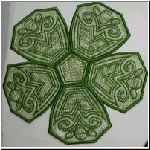
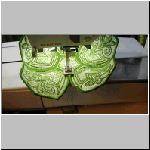
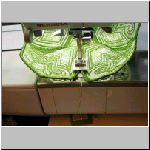
Step One: Stitch out the bottom and sides of your bowl on water soluble stabilizer. I have used two layers of Badgemaster and Arc Rayon thread 40wt for both the top and bottom thread. If you chose the 5 sided bottom, stitch 5 sides, or 6 sides if you choose the hexagonal bottom. You can also combine plain and decorated side panels as in Figures 1 and 4. You might notice the stabilizer pulling away from the design while stitching the final outside border. This does not harm the design, but if you are uncomfortable with it, slide a scrap of stabilizer underneath as it stitches. Do not remove stabilizer. Step Two: Assemble Bottom: Starting at one side of the bottom piece, and using a zig zag stitch on your machine, stitch around the edges of the bottom section, butting the bottom of the side pieces as you go. Once I had all the pieces attached (figures 1 and 4) I stitched one more row of zig zag stitches around the bottom piece for stability. Step Three: Stitch sides. Starting at the junction of the bottom and the side pieces and using a zig zag stitch, start sewing the two side pieces together. Just butt the sides next to each other slowly allowing them to meet all the way to the top of the bowl as you stitch (Figures 2 and 3) You will see the curves beginning to take shape. When you have reached the top of the bowl, turn your work and stitch back over the seam ending at the bowl bottom. Repeat for all sides. Step Four: Soak your bowl in water according to the instructions that came with your stabilizer. After soaking the recommended time, rinse the bowl thoroughly. This bowl is firm enough that you do not need to leave stabilizer in. (and then you won't have to worry if your bowl gets wet later on!) There will probably be a small amount left in the embroidery, but that is OK. Place on an absorbent surface, shape with fingers and allow to dry. When the bowl is completely dry, you can give the sides a light pressing. If any part of the bowl isn't quite in shape, use steam from your iron to soften it and reshape with fingers. |
|||
All of our machine embroidery designs will come in any or all of the following hoop sizes: (You will receive links to download the size(s) you purchased and all formats)
Small for 4 x 4 inch hoop, Medium for 5 x 7 inch hoop, Large for 6 x 10 inch hoop, and Jumbo 8 x 12 inch hoop.
Each design description above will state the sizes the set comes in: S, M, L, J standing for Small, Medium, Large and Jumbo. These will be written SML, meaning Small, Medium and Large, or perhaps MLJ, meaning Medium Large and Jumbo, or even SMLJ meaning the set comes in all four hoop sizes
Formats Available: ART3, ART4, DST, EXP, HUS, JEF, PES, VIP, XXX
If your format is not listed email us.

